

Tools & technique
Tattoo Stencil Paper: Choose the Right Type for Your Setup
Compare thermal, freehand and inkjet tattoo stencil paper. Learn how each transfers a design, what your setup needs, and which supplies to check before buying.
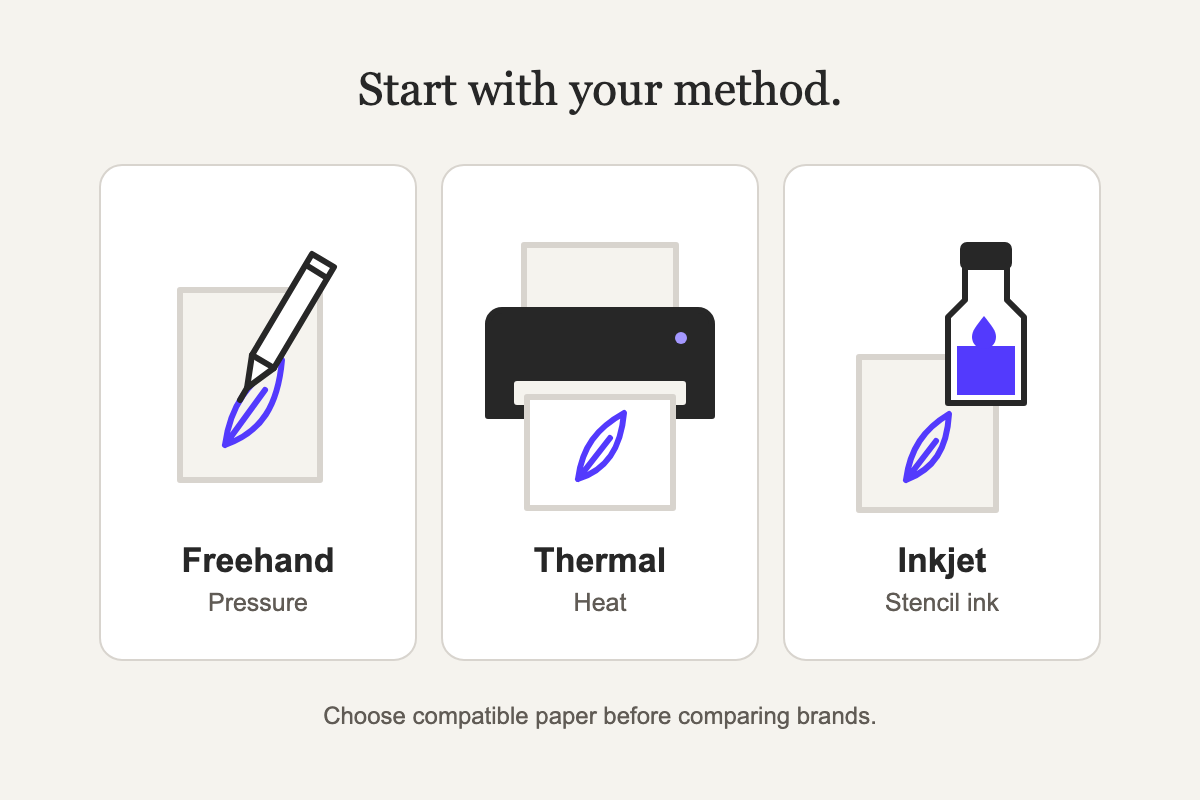
Buy for the way you make the stencil
For hand tracing, buy freehand tattoo stencil paper. For a thermal stencil printer, buy thermal transfer paper that the machine supports. For an inkjet stencil setup, buy the paper specified for its stencil ink. These are different supply lists, even when the finished marks look similar.
A cheap pack becomes an expensive purchase if you need a different printer to use it. Before comparing brands, find the full model name on your machine or decide that you will trace the design by hand.
| Your method | Paper to look for | Check before ordering |
|---|---|---|
| Hand tracing | Freehand, impact or hectograph transfer paper | A complete stencil set or a separate coated sheet that needs receiving paper |
| Thermal printing or copying | Thermal tattoo transfer paper | Supported dimensions, loading instructions and any carrier requirement |
| Dedicated inkjet printing | The stencil system's specified printing paper | Compatible printer, stencil ink and transfer product |
This article covers the choice between those methods. For individual thermal brands, colors and current pack-price comparisons, see our beginner guide to thermal stencil papers.
We publish StencilMaker AI, the stencil-preparation tool. The buying advice here comes from manufacturer documentation checked September 27, 2026. We have not measured these papers against each other in a studio trial.
How the image gets from paper to skin
There are two separate jobs: making the stencil on a sheet, then transferring that image to the prepared surface. A clear image on paper lets you inspect the design before placing it.
In a thermal set, heat causes the coated transfer layer to deposit the design onto the receiving sheet. The color supply is already in the paper, so the thermal printer does not need liquid stencil ink. Electrum's thermal-printer guide explains this process. With freehand paper, pressure from tracing produces the marks instead.
An inkjet stencil printer deposits dedicated stencil ink onto a suitable sheet. That sheet can be a single layer. It does not need the purple coated layer found in a typical thermal set.
The next stage uses a compatible transfer product. Spirit's instructions describe applying a thin layer of transfer cream, placing the image against it without sliding, then lifting the sheet and allowing the marks to set. That sequence explains the purpose of the paper. For application, follow the products' instructions and your studio's hygiene procedure.
Inspect the sheet and the transferred image separately. A missing line on the sheet points you toward the drawing, tracing or printing stage. A complete line that becomes doubled during placement points you toward the transfer stage. Replacing the paper may leave the second problem untouched.
Freehand paper: when you want to trace the lines yourself
Freehand, impact and hectograph are names you will encounter while shopping for manual tattoo transfer paper. Pressure is what makes this category useful. You draw or trace the lines you need onto the receiving sheet through the coated layer, following the product's sheet arrangement.
Spirit Classic Freehand is a complete paper product made for this job. Spirit describes its wax-and-dye coating as responsive to pressure. It is the version we would choose for someone who wants to hand trace a design and has no stencil printer.
Check the contents when a listing says carbon paper. Spirit Classic Sheet Carbon, for example, supplies coated sheets without the receiving sheet, protective tissue or backing. The buyer supplies the rest of the tracing arrangement. Spirit explicitly says this product is for hand use and is incompatible with thermal or fax-style printers.
That gives two similarly named products different shopping requirements. A complete freehand set is the simpler first purchase. Separate tattoo sheet carbon makes sense when you already have a manual process and know which receiving paper you need.
A paper original also gives you a place to decide which marks belong in the stencil. Trace the intended contours and guides. Copying every patch of pencil shading can leave a drawing that is harder to read at tattoo size.
Thermal paper: match the set to the machine
Thermal tattoo paper is made for a compatible stencil printer or copier. Start with the paper category and dimensions named in the machine's instructions. A product advertised as thermal receipt paper is not a substitute for tattoo transfer paper.
A typical thermal set contains a receiving sheet, protective tissue, a coated transfer layer and a backing. Spirit counts these as three sheets plus the tissue. Its impact sets have two sheets plus tissue, so counting four layers is not a rule for every kind of stencil paper.
The protective tissue comes out before imaging. Backing removal depends on the setup. S8's red-paper instructions explicitly make that choice dependent on the imaging method. Use the loading diagram for your equipment rather than copying the arrangement from a video of another printer.
For a supported thermal setup, we would start with Spirit Classic Thermal in a 25- or 50-unit pack. A smaller box gives you enough paper to establish a repeatable print before ordering a larger quantity. Follow your printer maker's specific paper recommendation if it has one.
Some thermal papers also support hand tracing. S8 Red lists both thermal and impact use. That overlap does not make every freehand paper printer-compatible. Read the exact product listing, especially if you plan to use one pack for both methods.
Inkjet paper belongs to a complete stencil system
Inkjet stencil printing requires more than a packet of special paper. The printer, ink, media and application product need to work together.
For a concrete example, InkJet Stencils sells single-ply stencil printing paper validated for its own ink. The listing offers 500-sheet packs in 8.5 × 11 and 8.5 × 14-inch formats. There is no colored donor sheet to peel away.
The company's printer-buying guide recommends a new Epson EcoTank that has never run ordinary printer ink. It identifies the ET-M1170 as its preferred model. That is a recommendation for the InkJet Stencils system, not a statement that any printer carrying the Epson name will do.
Its application instructions also specify Stencil-Prep spray. They say ordinary thermal stencil preparations do not activate its ink transfer. Keeping an existing bottle of thermal transfer cream therefore does not necessarily save a purchase when you change systems.
If you already use InkJet Stencils ink in a supported setup, its specified paper is the sensible starting choice. If you own another stencil-ink system, use that supplier's media instructions. We would not order a ream on the assumption that all inkjet stencil papers and transfer products are interchangeable.
For someone starting from zero, price the complete setup before comparing paper costs. The decision includes a dedicated printer and ink supply. A low price per blank sheet describes only one part of that purchase.
What to check on the packet or product page
What the quantity counts
A thermal unit contains several layers that perform one stencil-making job. A 100-unit box does not become 400 printable stencils because each unit has four layers. Read whether the quantity refers to complete sets, loose coated sheets or single sheets for an inkjet system.
Actual dimensions and usable print area
Match the measurements to the machine's supported media. Letter is 8.5 × 11 inches. A4 is 210 × 297 mm. They are close enough to be confused in listings and different enough to check carefully. Leave room for any feed margins specified by the printer.
A longer sheet also needs a printer and app that support the intended length. Spirit's Classic Thermal Roll allows custom lengths, but its instructions call for an extra-long carrier in thermal machines. Buying a roll does not change your printer's feed limits.
A product name that identifies the method
Look for a clear distinction between Thermal, Freehand and Sheet Carbon, plus a readable manufacturer instruction page. A photograph of purple sheets is not enough to identify how a product should be used.
Order through the maker or a supplier that can confirm the exact product and handle a damaged pack. If a listing combines several formats, check the selected variant again before paying. The product photo may show a different size from the one in your basket.
The rest of the supplies
List any required carrier, receiving paper, stencil ink and transfer product beside the paper price. This is especially useful when moving from manual tracing to printing or changing from thermal to inkjet. The previous setup's supplies may cover only part of the new process.
Judge value by usable stencils
The lowest price per sheet is useful only after you know the paper works in your setup. Compare the delivered pack cost with the number of usable stencil prints it produces. Keep wasted sheets in the count.
For example, a hypothetical $20 pack that yields 40 usable prints costs 50 cents per print. A $30 pack that yields 90 costs about 33 cents. Those are arithmetic examples, not test results for any brand. Inkjet comparisons also need to include ink use, and the overall budget needs the equipment and transfer supplies.
When trying a new paper, keep a familiar design and record the settings. Include a few close lines and a curve you can inspect at the intended size. Look at the printed sheet before assessing the transfer. Change one part of the process at a time so you can tell what caused the difference.
Keep unused paper flat and protected in its packaging, following the manufacturer's storage instructions. Electrum identifies humidity-exposed paper as one cause of faint prints. Inspect the condition of a pack before deciding that its brand or your printer is the problem.
Give the paper a drawing worth copying
Paper reproduces the marks you send or trace. It cannot choose the edge of a petal, remove an unwanted shadow or decide which side of lettering should face out.
Prepare your reference in StencilMaker AI when you need to turn an image into stencil linework. Review the result against the original, make corrections and set the physical size before exporting. The printer's own app or driver then handles printing onto the chosen media.
Check the printed dimensions and final orientation before transfer. If you are tracing by hand, put the intended size on the reference first. If you are printing, check the app's scaling and mirror settings. The paper purchase and the file preparation both need to be right.
Our buying verdict
Choose a complete freehand set such as Spirit Classic Freehand when you want to trace by hand. Reserve loose sheet carbon for a manual setup where you already know the other materials you need.
For a compatible thermal printer, start with its specified paper or a small Spirit Classic Thermal pack that meets its requirements. Use our thermal-paper comparison and loading guide once you have settled on that method.
For an established inkjet stencil setup, buy the media specified for your ink. For InkJet Stencils, that means its single-ply stencil paper and documented application system. Check the complete equipment cost before choosing inkjet as a new purchase.
The first pack should answer a practical question: can this setup produce a clear stencil, at the right size, with supplies you can order again? Buy a larger quantity after you have that answer.
Frequently asked questions
Are tattoo stencil paper and transfer paper the same thing?
Tattoo suppliers often use both names for paper that helps carry a stencil onto skin. Transfer paper is also used for unrelated products, so check that the listing specifies tattoo use and the intended manual, thermal or inkjet method.
Is tattoo sheet carbon a complete stencil-paper set?
Not always. Spirit Classic Sheet Carbon supplies the coated sheets without receiving paper, protective tissue or backing. Its Classic Freehand product is a different option. Check the contents instead of assuming the word carbon describes a complete set.
Do thermal tattoo stencil printers need ink?
They use heat and compatible coated stencil paper, so they do not need liquid stencil ink. Dedicated inkjet stencil systems do need stencil ink and the paper specified for that system.
Can one stencil paper work for both tracing and thermal printing?
Some products support both methods. S8 Red explicitly lists thermal and impact use. That does not make all manual papers heat-compatible. Spirit Classic Sheet Carbon, for example, is specified for hand use only.
Does four-layer paper produce four stencils per sheet?
No. The layers have different jobs within one thermal set. They are not four separate sheets ready for printing. Compare the number of complete units in the pack.
Will an inkjet stencil sheet work with ordinary printer ink?
Buying stencil paper does not turn ordinary office ink into tattoo stencil ink. Use the printer, dedicated stencil ink, paper and transfer product documented by the stencil-system supplier.
Sources
- Spirit: Create a Stencil
Thermal and impact set construction, tissue removal and transfer application.
- Spirit: Classic Freehand
Manual paper and its pressure-responsive wax-and-dye coating.
- Spirit: Classic Sheet Carbon
Coated sheets supplied separately. The maker specifies hand use only.
- Spirit: small-count Classic Thermal
25- and 50-unit thermal packs. Match the chosen format to the printer.
- Spirit: Classic Thermal Roll
Custom-cut lengths and the maker's extra-long carrier requirement.
- S8: Red Stencil Paper instructions
Thermal and impact use, tissue removal and conditional backing removal.
- InkJet Stencils: stencil printing paper
Single-ply paper, pack quantity, sizes and validation for the company's own ink.
- InkJet Stencils: How to Use
The supplier's printing and transfer-product requirements.
- InkJet Stencils: printer-buying guide
New EcoTank requirement and ET-M1170 recommendation. Published August 13, 2026.
- Electrum: thermal printer setup guide
Thermal imaging and paper-condition troubleshooting. Manufacturer guidance, not independent testing.